Controlling the temperature during fermentation is as important as nailing the temperatures during mashing. A temperature controller can help to approach and hold the perfect fermentation temperature. But there is more: Ideally, the temperature controller supports to hold temperatures for a set amount of time – e.g. to program a cold crash or diacetyl rest. Being able to monitor everything remotely using the smartphone (Android, iOS) is the cherry on top. Let’s discuss how BierBot Bricks offers all of that.
Improve your beer quality
As eluded in the intro, setting the correct temperature during fermentation by a controller has several positive impacts on your beer quality:
- Setting the temperature as recommened by the yeasts manufacturer (e.g. for Whitelabs German Ale II Yeast a temperature range of 65°-70°F / 18°-21°C is optimal) ensures that the yeast is quickly turning sugar into alcohol – without producing any unwanted side flavours.
- Depending on your yeast style and ambient temperature either cooling or heating may be required. E.g., in cold countries when fermenting with a top-fermenting ale or wizen yeast, heating ♨️ may be required. In a hot summer when fermenting using a bottom-fermenting lager yeast cooling may be required. The ideal fermentation temperature control thus has support both.
- A cold crash is an additional fermentation step that makes the beer more clear. By cooling the beer rapidly down to almost freezing (32°F / 0°C) temperature, particles that make the beer foggy will fall out and set down on the bottom of the vessel.
- Being able to permanently monitor the temperature remotely using a smartphone gives you the chance to act immediately, if something is wrong. This can be as simple as turning on a fridge that you forgot to turn on or pitching more yeast, if yeast activity is not picking up.
- A diacetyl rest can reduce the amount of diacetyl in your beer. Diacetyl is a unwanted, buttery flavor. Increasing the fermentation temperature to 57°F-61°F / 14-16°C towards the end of the fermentation reduces the amount of diacetyl in your final beer. A higher temperatures boost the conversion rate from 2‑Acetolactat to Acetyl (yes, that’s right). As long as the yeast is vital the Acetyl is however reduced to Butanediol – which is much harder to taste (source).
- Did we miss something? Tell us in the comments below!
BierBot Brick(s) as a fermentation controller
Let’s talk about how the BierBot Bricks software and fermentation controller can help with all of that. BierBot Bricks is a software available for free which is tailored towards homebrewing, or more specifically: controlling the fermentation. The BierBot Brick on the other hand is a device with a relay that turns your fridge, freezer or glycol chiller on and off to reach the set target temperature. We don’t want to discriminate any type of device, but we will just call it ‘freezer’ in the following 😀️.
Step 1: Connecting your BierBot Brick to your account / brewery
There is a great tutorial how to do so in the official documentation / manual available here. We’ll skip this part.
Step 2: Assigning the BierBot Brick to your freezer
Now comes the fun part: Asigning the relay of your BierBot Brick to control the cooling of your freezer. If you have a heating mat wrapped around your fermentation tank and a 2nd BierBot Brick, you can use the relay of Brick #2 to control the heating. Place the temperature sensor in the fridge or fermentation vessel and drop that onto the fermentation tank as well.
Step 3: Creating a recipe
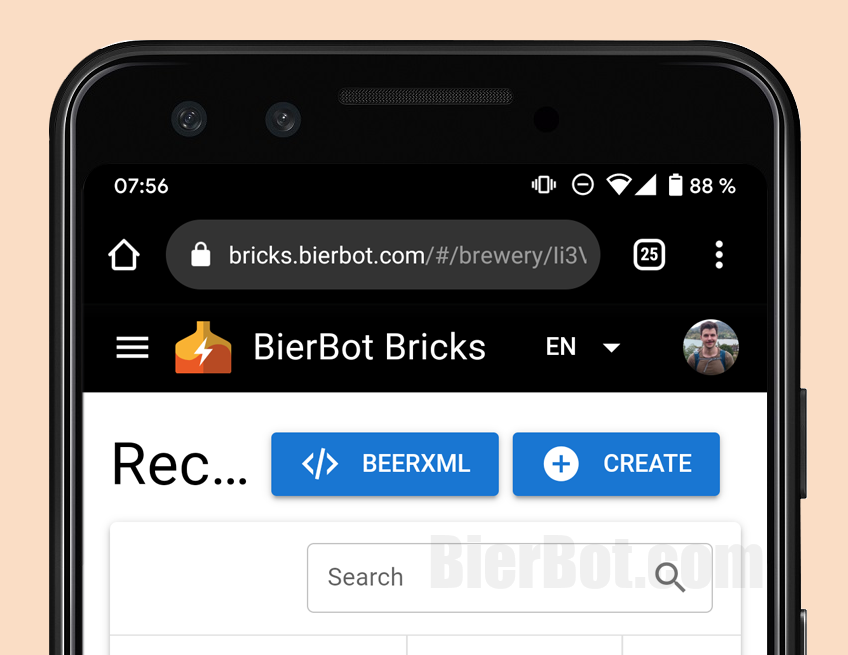
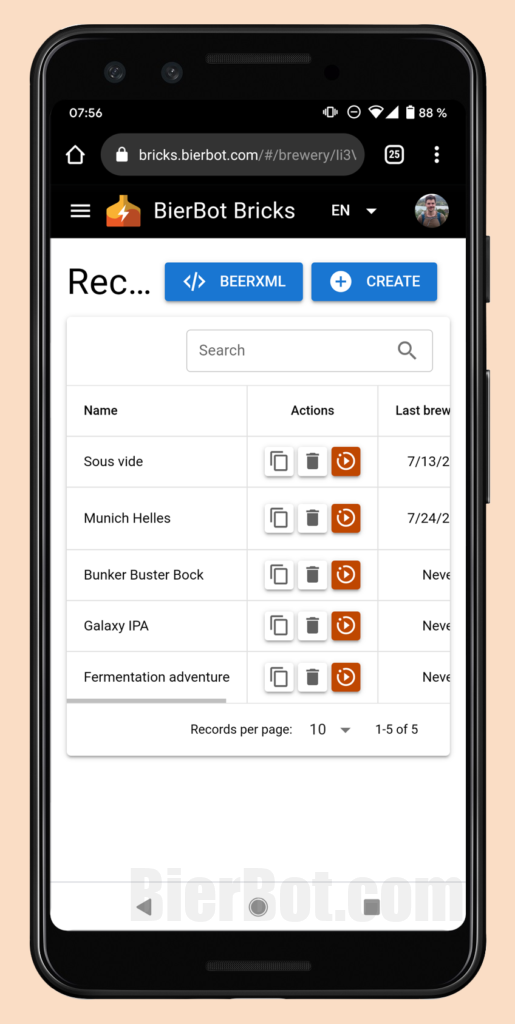
A recipe tells our software how long you want to hold which temperature. Also, a recipe has the benefit, that everything do is perfectly repeatable. To create a recipe, head over to “Recipes” and hit the blue “Create” button on the top-right corner:
After the recipe is created, you can change it’s name, wort volume, etc.:
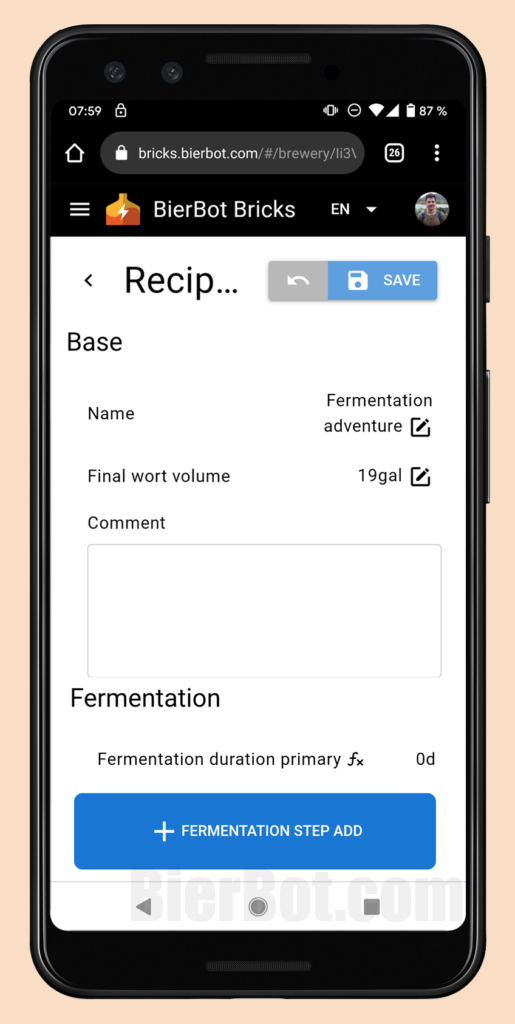
Create a new fermentation step by clicking “Fermentation step add”. Now, you can set the following parameters:
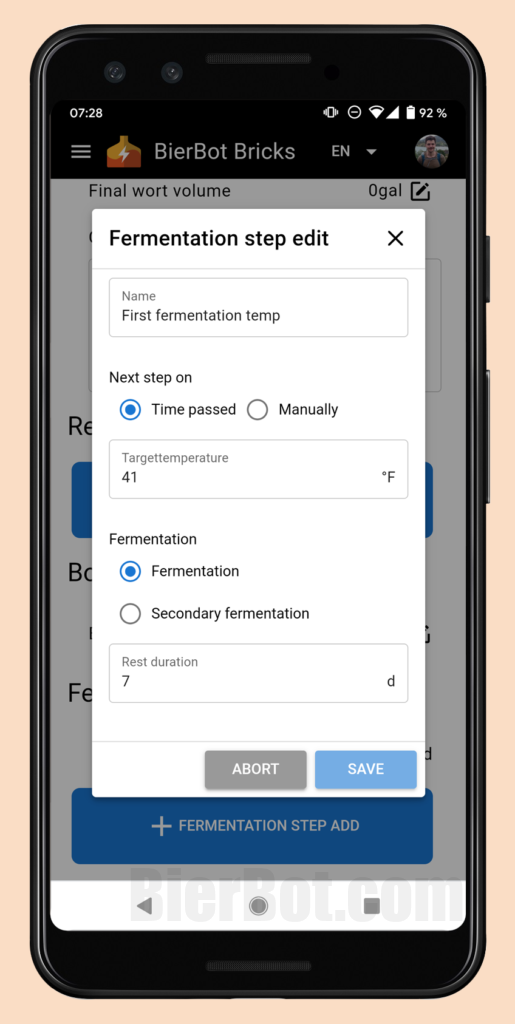
- Next step on
- Time passed: Set a number of minutes the targettemperature should be held before moving on to the next step
- Manually: The next step will never be automatically triggered. You need to manually click on the “next-step” button in the automatic mode.
- Targettemperature: Set the targettemp in your configured unit.
- Rest duration: Set the number of days to be waited after reaching the target temperature. This will only be shown if “next step on” is set to “time passed”.
- You can select whether this step is for primary “fermentation” or “secondary fermentation” – which will ultimately determined the “time to bottle” (which will be used in future versions of the software).
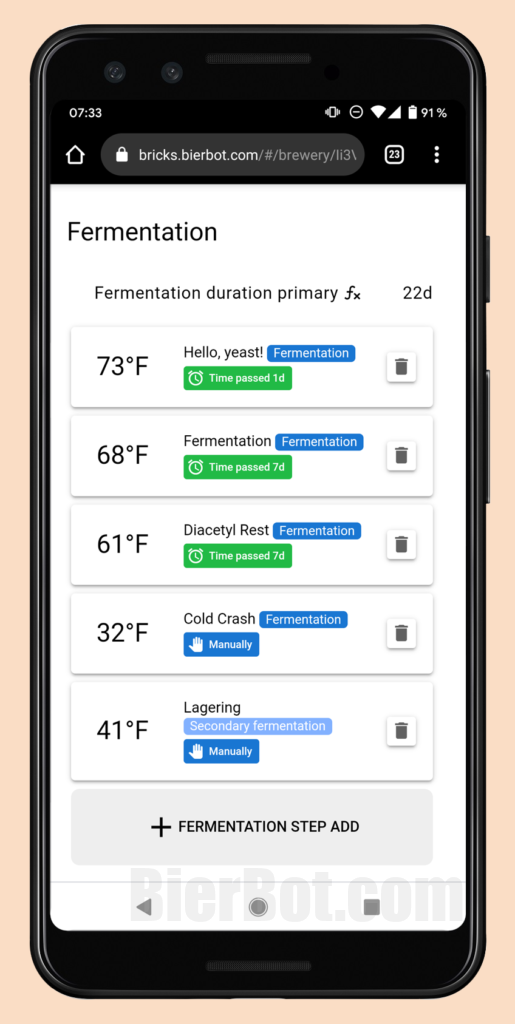
We will repeat this for all fermentation steps needed. A final output might look like this:
Step 4: Starting the brew
Now we’re ready to start the brew by clicking the orange play button on the recipes page.
Your recipe will be followed as programmed. As cool addon you’ll get nice plots of your temperature history (and specific gravity, but that is a different article). You can even add textual logs. Let’s finish up with a real-life screenshot from a PC / Mac – everything you saw before will work well on screens of any size (Tablet like iPad 📱, Computer 💻 & TV 📺).