
This tutorial will show you build the how to build the worlds easiest to build brewing control. It’s very cheap to build, too. But it still offers all the features you need: Support for mashing and fermentation, recipes, auto calibration, etc. It can control up to 20A of electricity. We’ll be using an of the shelf WiFi switch: the Sonoff TH Origin rocking an ESP32.
Don’t be overwhelmed by the following amount of text. I tried to make the tutorial precise enough so that even beginners can follow easily. We’ll cover the following topics:
- Needed materials and tools (hint: not a lot)
- The actual build (connecting two wires)
- Flashing the FREE software
- Setting up your first mashtun
And if you prefer a YouTube video instead of a writting version, we also have you covered:
If you want to read about the features: There is a feature list available at the bottom.
Materials and tools
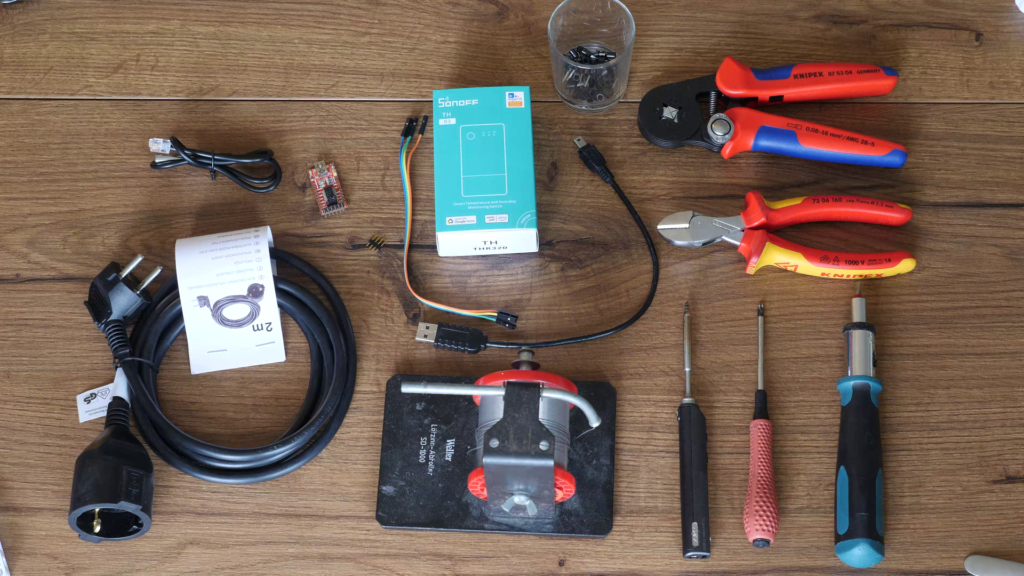
Required materials:
- Sonoff TH Origin (16A and 20A version available), other Sonoff Origin devices will work most likely
- DS18B20 Temperature connector with RJ11 jack (alternatively you can get an old DS18B20 sensor with a micro AUX jack and an adapter to RJ11)
- An AC extension cord capable of throughputting the desired amperage (i.e. 16A) or wattage (i.e. 3680W). I recommend 2m in length
- Something to connect to mass wires, i.e. Wago 221 or chandellier terminals.
- 4×1 rainbow cable (female on both sides)
- 4×1 pinheader
- Wire end ferruls, optional
Required tools
- Pliers (i.e. a Leatherman)
- File (i.e. a Leatherman)
- Sidecutter, or something to cut the extension cord
- Something to strip the insulation of cable endings, i.e. the Knippex Multistrip
- USB to serial converter (set it to 3.3V)
- Soldering iron i.e. the awesome TS100.
- Mini USB cable
- Longitudinal screw driver
- Philipps screw driver
- Third hand to hold the pinheader in place while soldering, optional
- Wire end ferrul pliers (optimally with 4 jaws), optional
The build
Preparing the Sonoff TH Origin
Open the lower cover on the housing with the longitudinal screw driver. Start at the sides. Then, use a table spoon to lever the cover away.
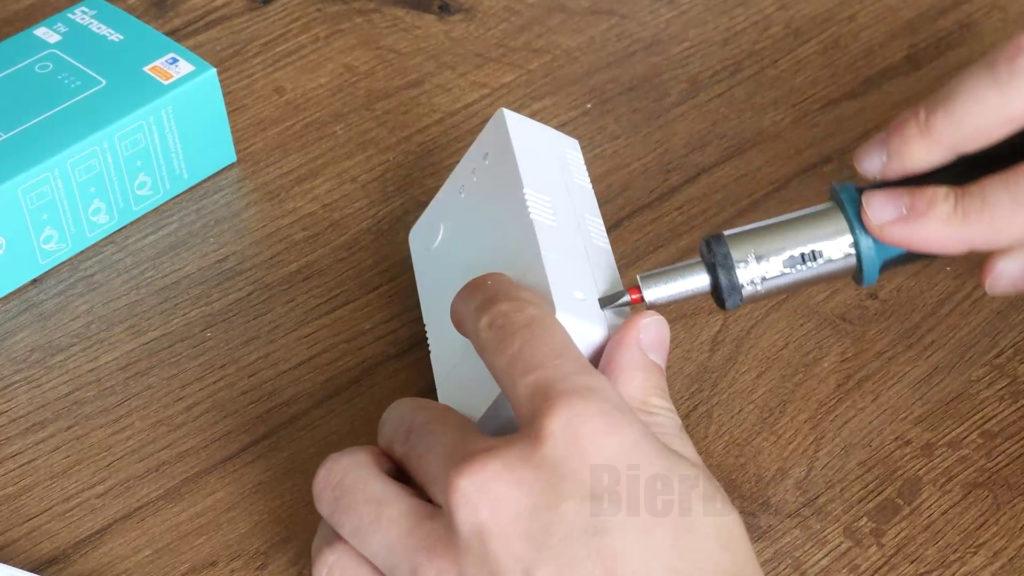
.. using a screwdriver… 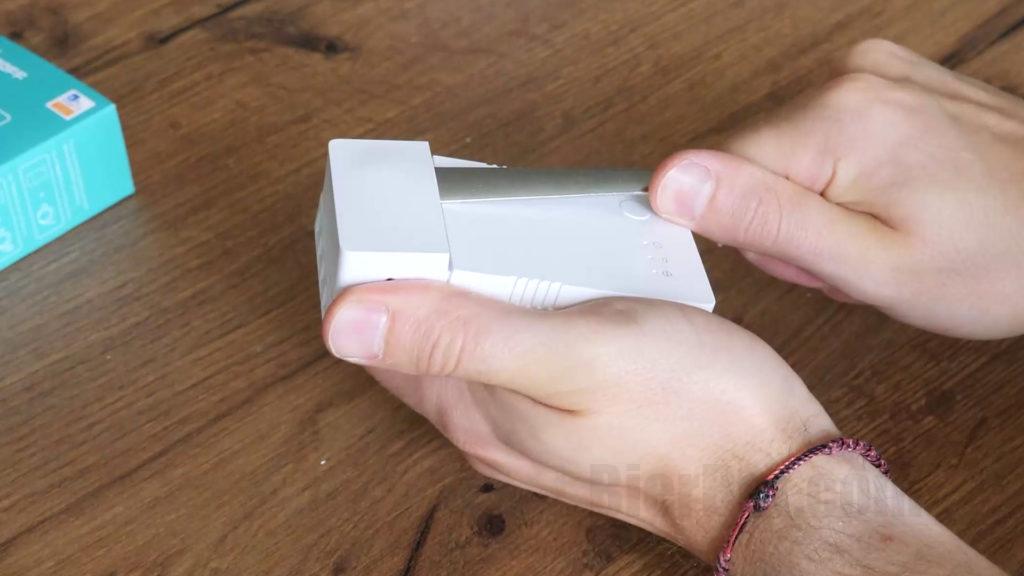
..or tablespoon
Flip the Sonoff TH Origin and remove the fours screws at the back.
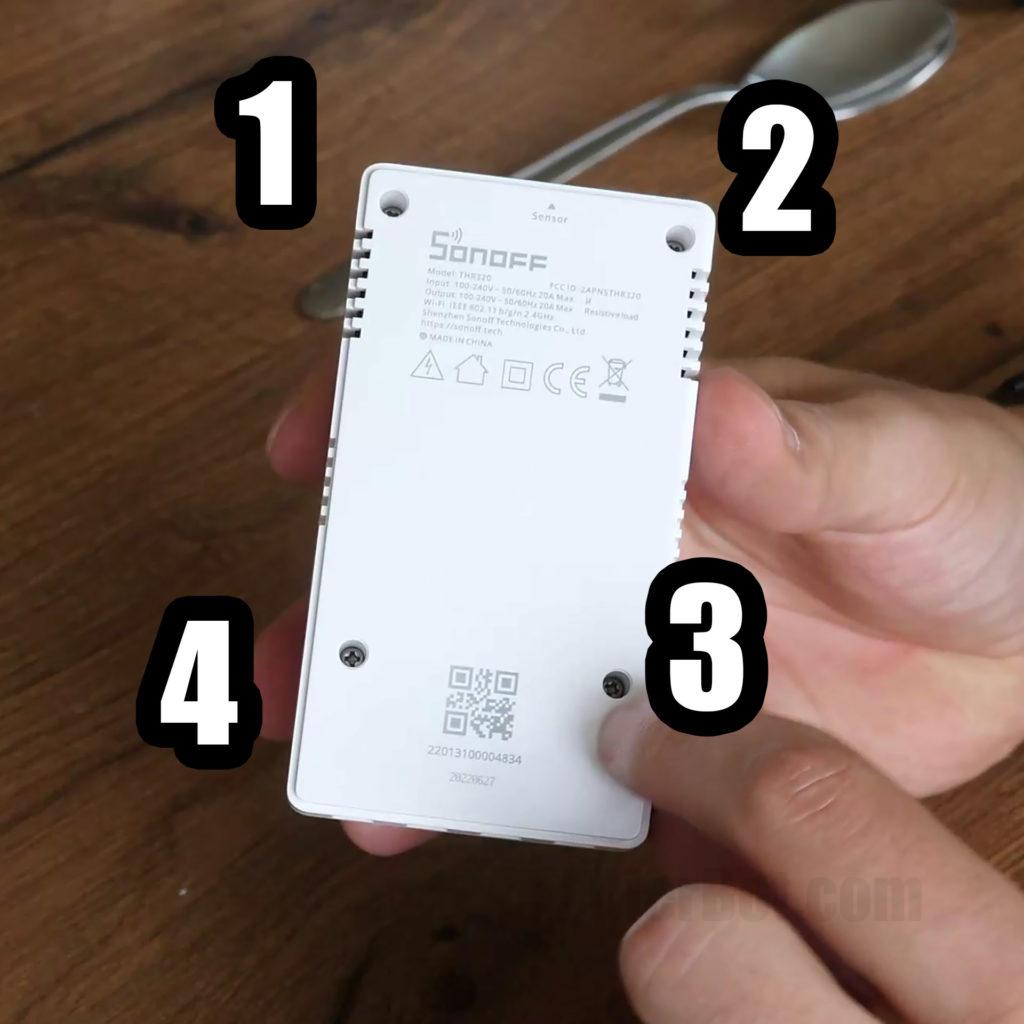
Remove the four screws holding the PCB in place.
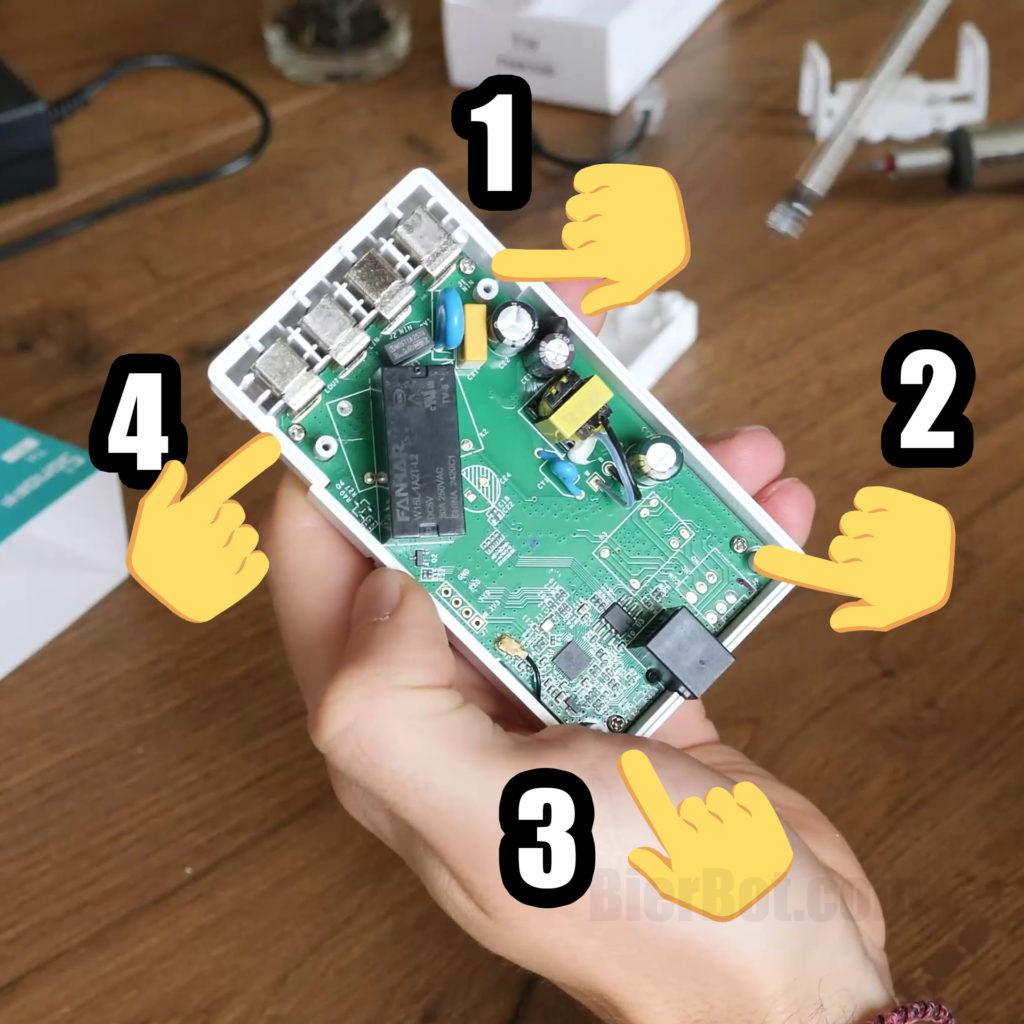
Carefully lift the PCB out of the housing because the WiFi antenna cable is still connected. Remove the WiFi antenna cable.
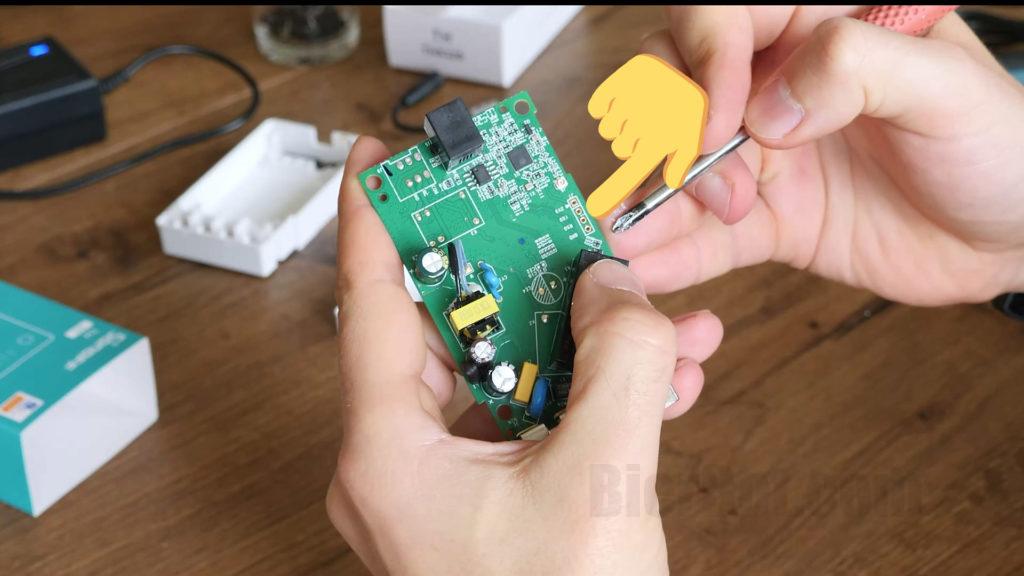
Locate the four DIP holes labelled GND, RX0, TX0, and 3V3 on the PCB. Solder the 4×1 pinheader onto it so that the PCB header sticks out on the same side the relay and RJ11 jack is on the PCB. Clamp the pinheader to the PCB, locate the clamp in the middle of the pinheader. Solder the two pins on the outside first, remove the clamp, and solder the inner two.
Locate the DIP holes. 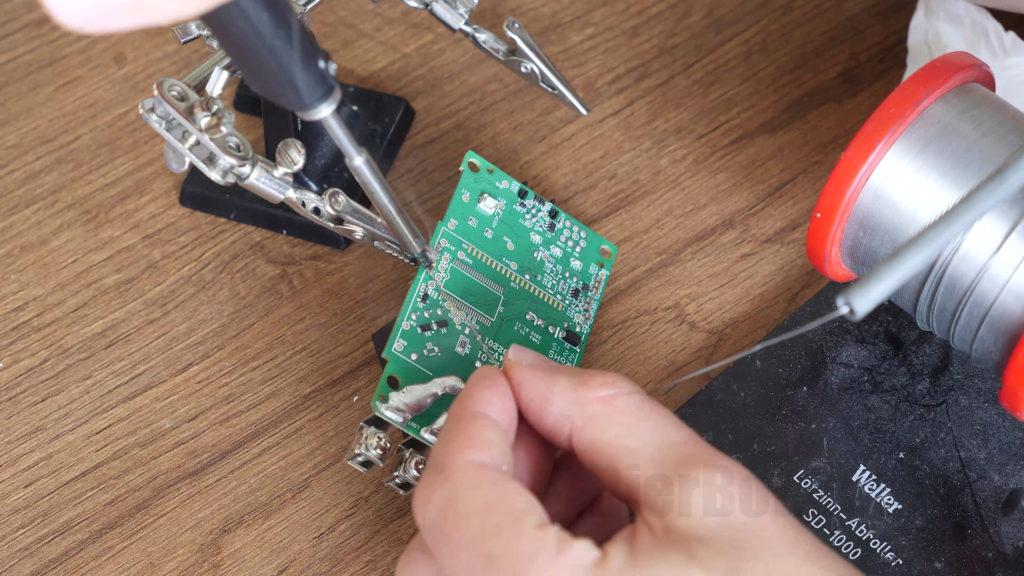
Soldering the pinheader.
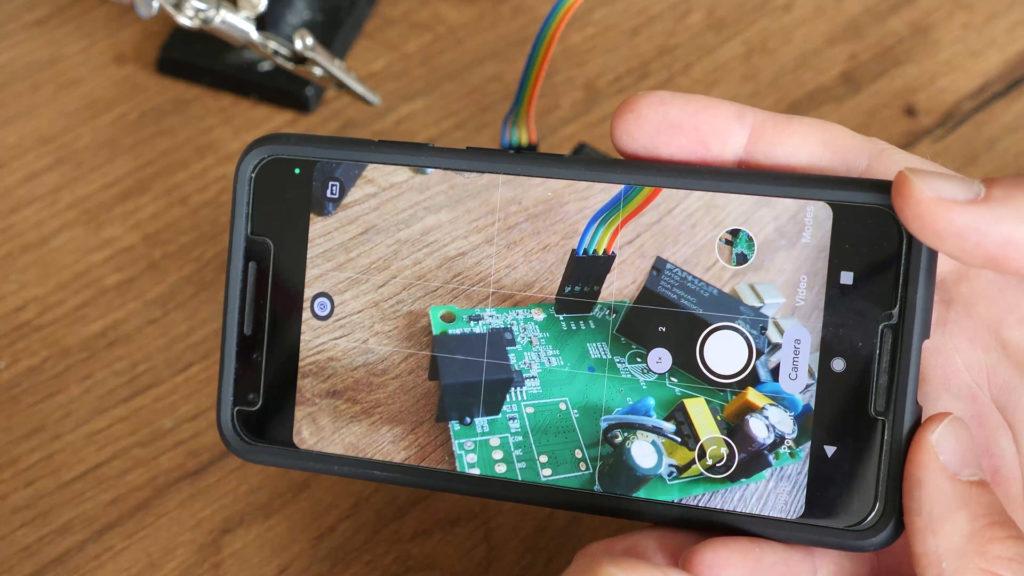
Connect the rainbow cable and take a picture for future reference.
Reconnect the WiFi cable. Use the file to make a notch for the rainbow cable on both sides of the housing. It should be about 1mm deep and just as wide as the rainbow cable. Be carefull to “mirror” the location so the notches “meet” when the housing is closed.
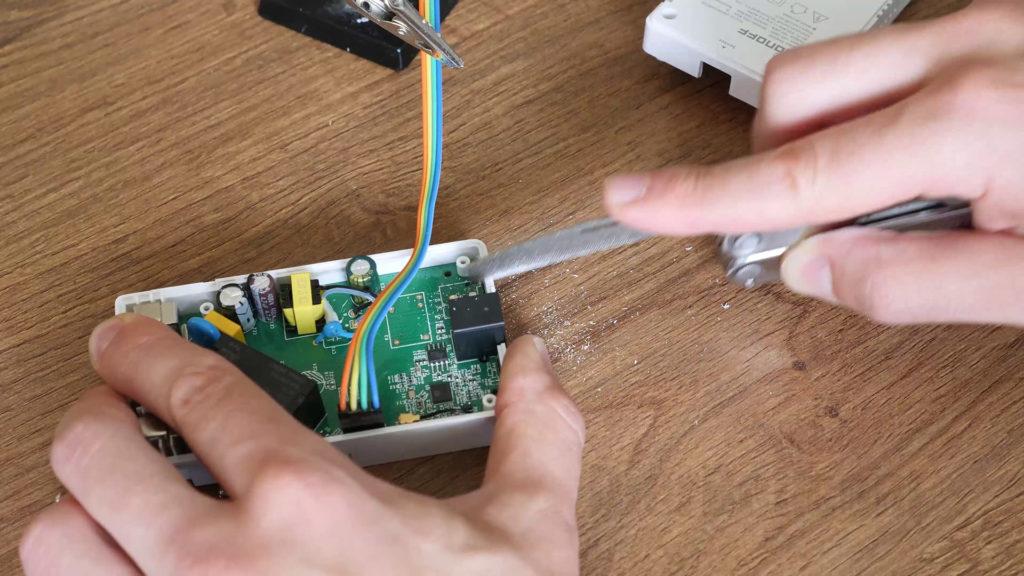
File some notch for the rainbow cable to go through… 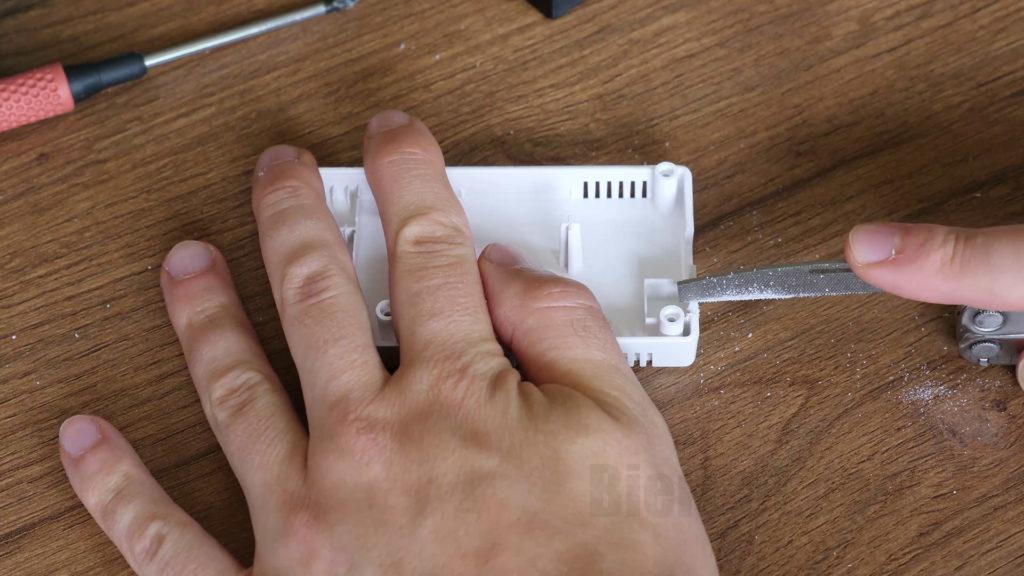
.. on both sides of the housing.
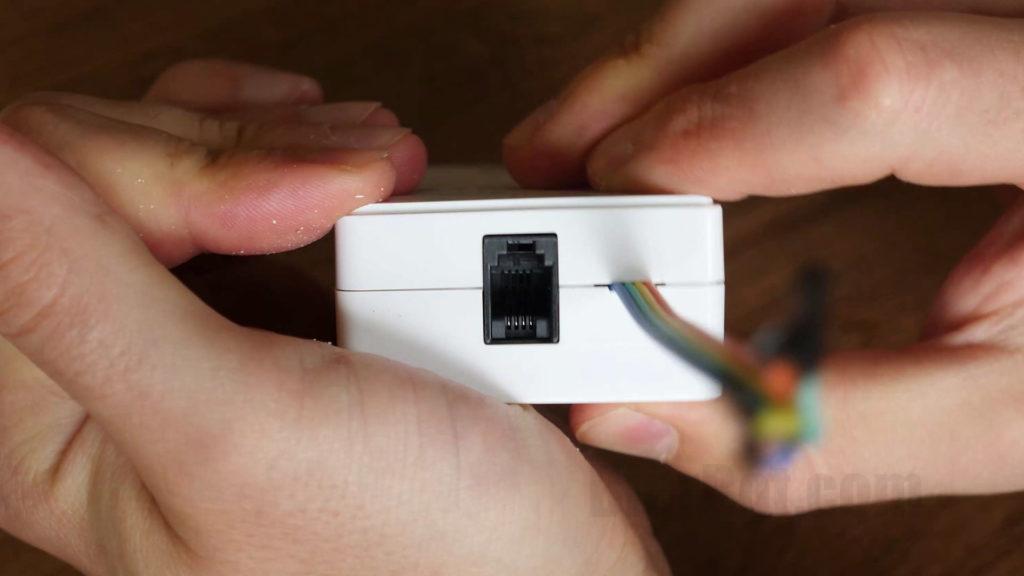
Put the PCB back into place (using the 4 screws), close the housing again (also using four screws). The rainbow cable should have just enough space.
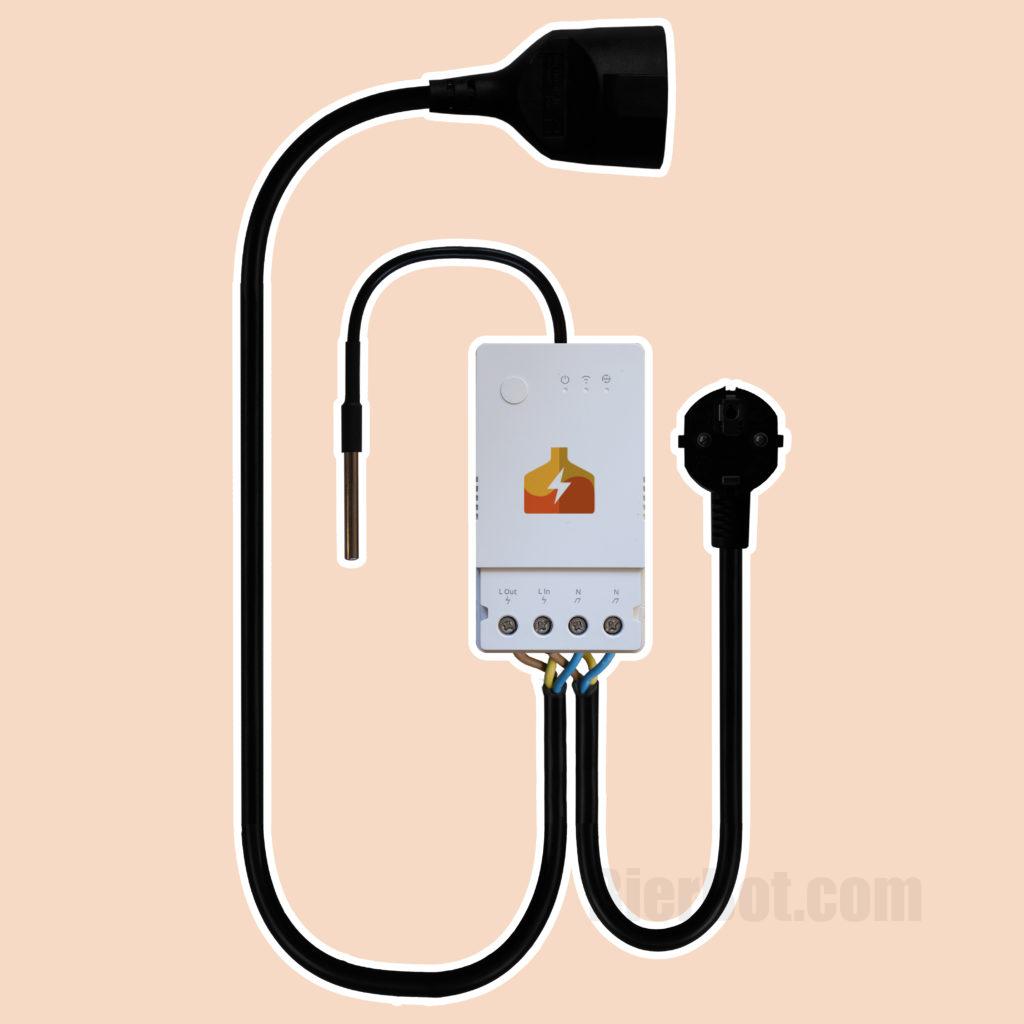
Attach the cables
Now it’s time to connect the AC cable. First, cut a AC into half (or whereever you want 🙂).
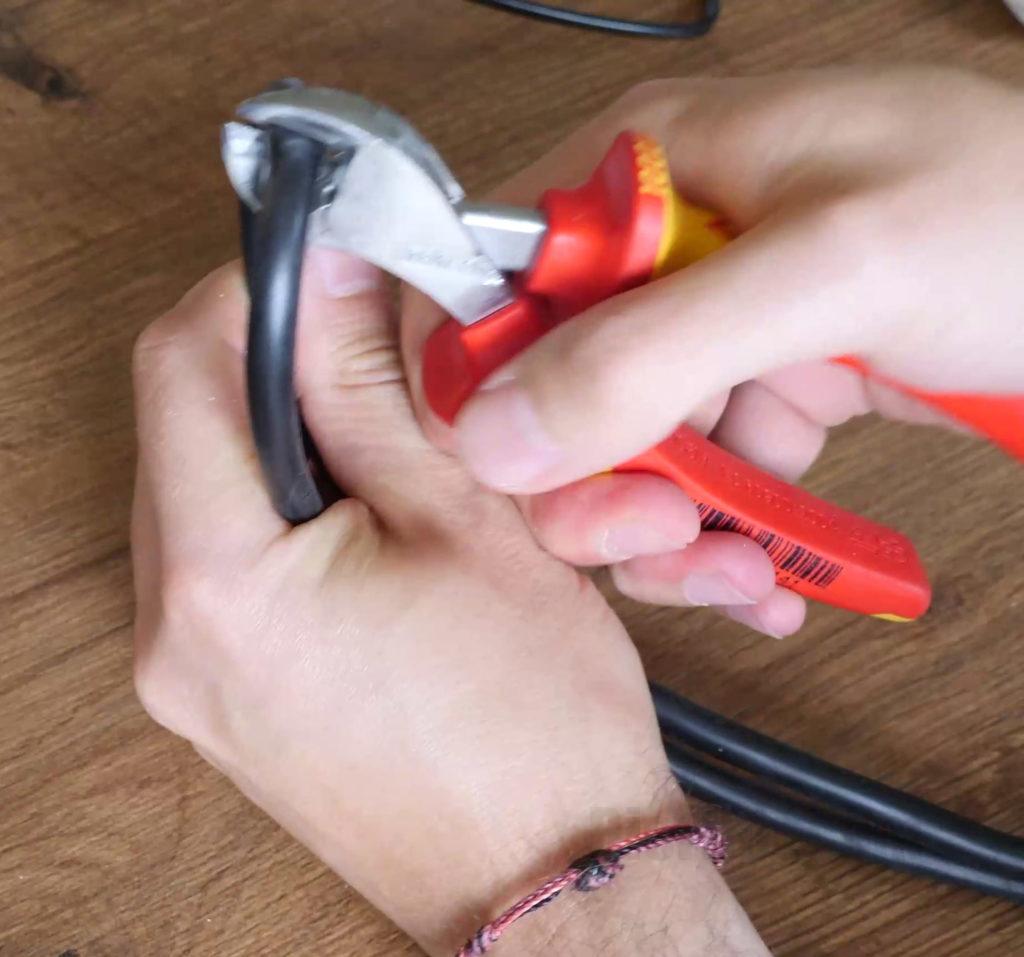
Strip the insulation of the outer cable and all inner cables. Crimp wire end ferruls onto all ends. Repeat that for both loose ends of the AC cable.
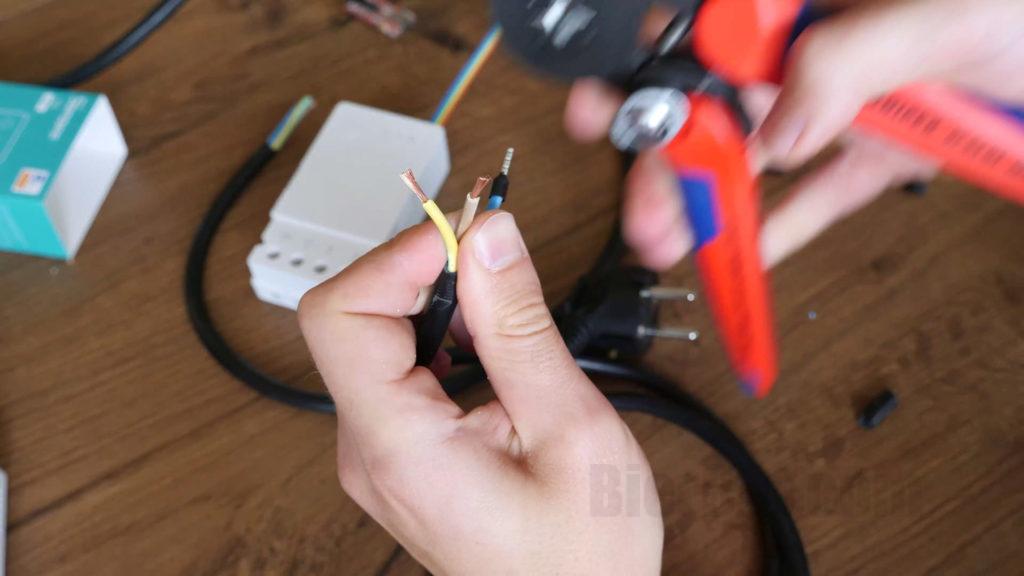
Now it’s time to connect he AC cables and the Rainbow cable. Refer the following diagram:
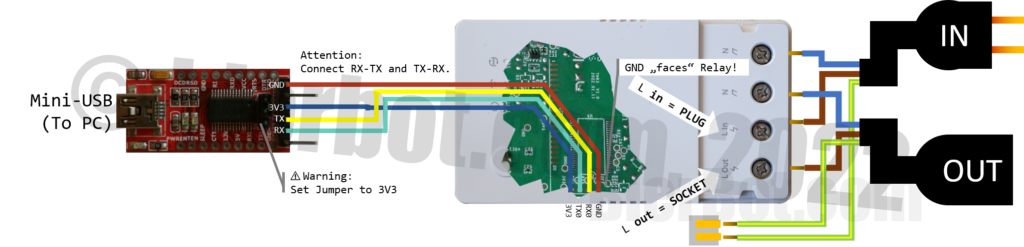
Connecting the AC cables to the Sonoff TH Origin is easy:
- the blue cables go to N (whether it’s the socket or the plug does not matter).
- The brown cable coming from the plug / wall must go to “L In”, the brown cable going to your brewing equipment must go to “L Out”
- The mass cables are connected outside the Sonoff TH Origin using i.e. the Wago 221 or a chanedellier terminal
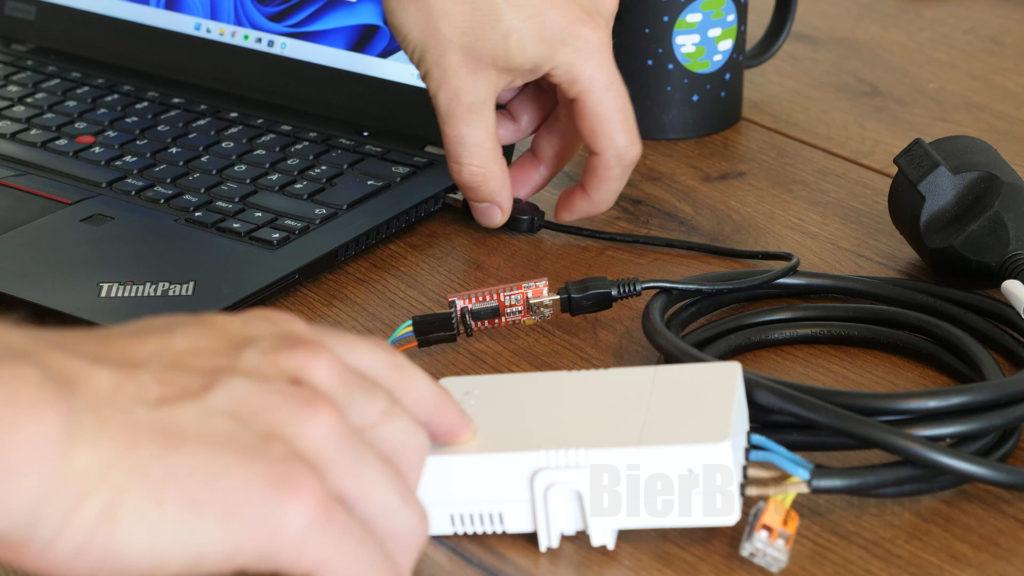
Snap the cover back into place. Next step is to connect the USB to serial converter. The rainbow cable should be connected as follows:
- GND to GND
- RX from the TH Origin to TX of the USB to serial converter
- TX from the TH Origin to RX of the USB to serial converter
- 3V3 from the TH Origin to VCC of the USB to serial converter. ⚠ Set the jumper of the USB to serial converter to 3V3. The converter is most likely set to 5V when it’s delivered. This will fry your TH Origin.
- Mini USB to your PC (as you might have guessed 😉)
Flashing the free software
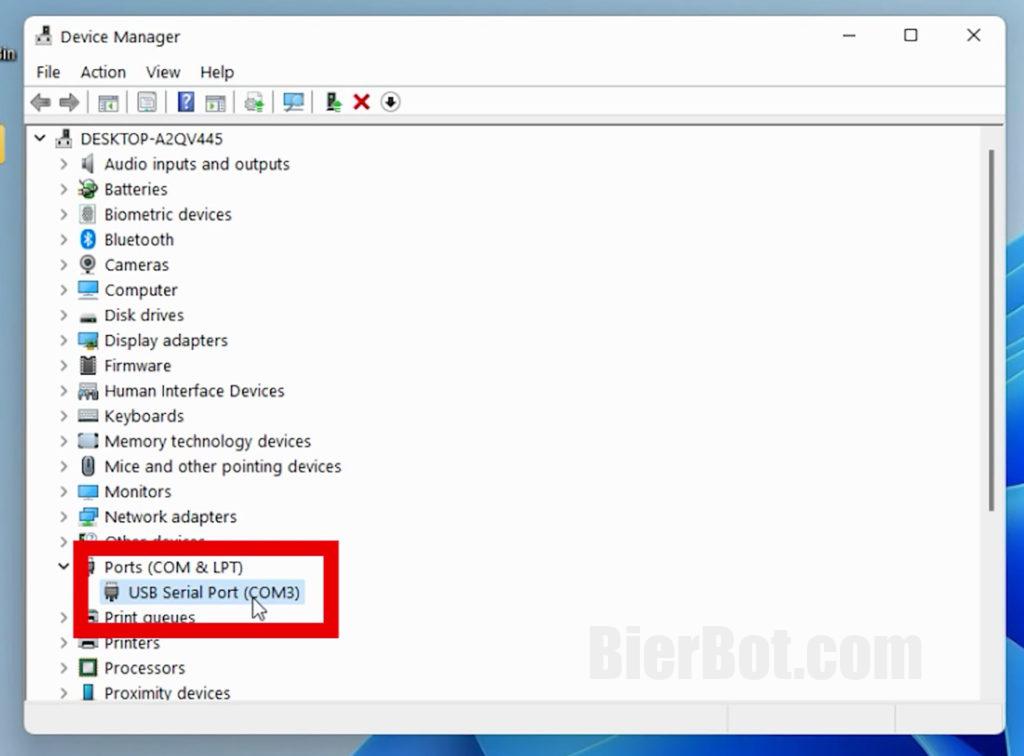
Go to the device manager by hitting the “Win” key and typing “Device manager”. Be sure to plugin your USB to serial converter. Unfold the “Ports (COM & LPT)” section, and look for an entry saying “USB Serial Port (COM…)”. Note the number, i.e. “…” is in my case “3” / COM3:
Grab the latest release of the free software here: https://github.com/BernhardSchlegel/Brick-32/releases/latest. Download the topmost zip file by clicking on it (i.e. “brick32_release_v.0.8.0.zip”, the “0.8.0” will be higher version when you get there). After download, unzip it to a folder. We’ll call that the “release folder” in the following.
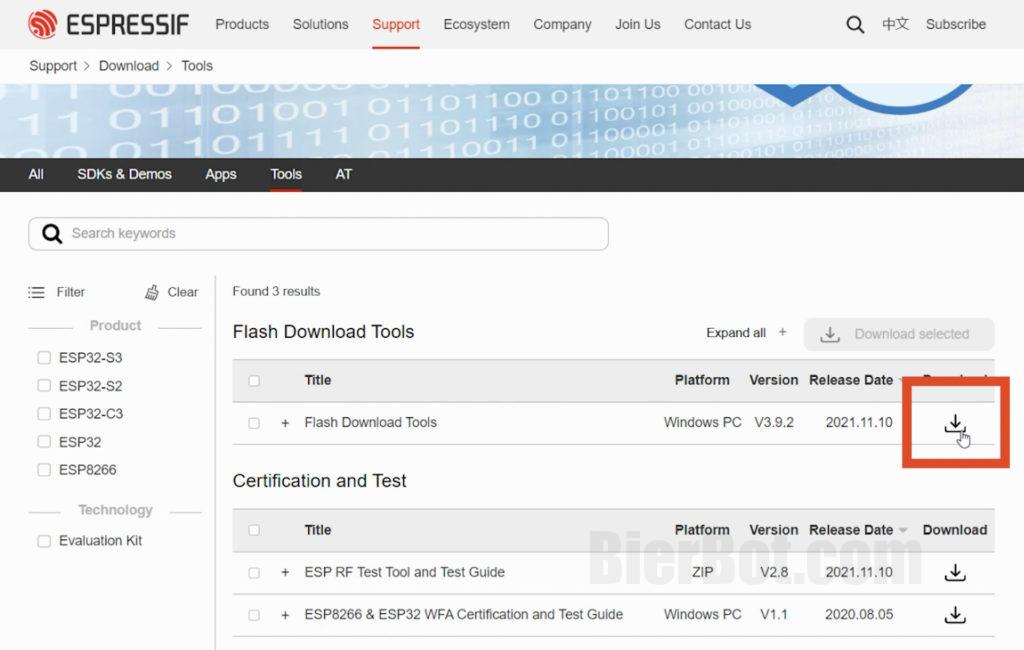
Next, we need to grab the “Flash Download Tools” from here: https://espressif.com/en/support/download/other-tools. Download the latest version by clicking the download icon on the right. After download finished, unzip it. We’ll call that folder the “Flashing Tool folder” in the folder.
Open the flash download tool executable (i.e. “flash_download_tool.exe”) from the flashing tool folder. When windows annoys you with an “we protected you” screen, hit “more info” and “run anyway”. Select “chipType” to be “ESP32” (workMode can stay on “develop”). Hit OK.
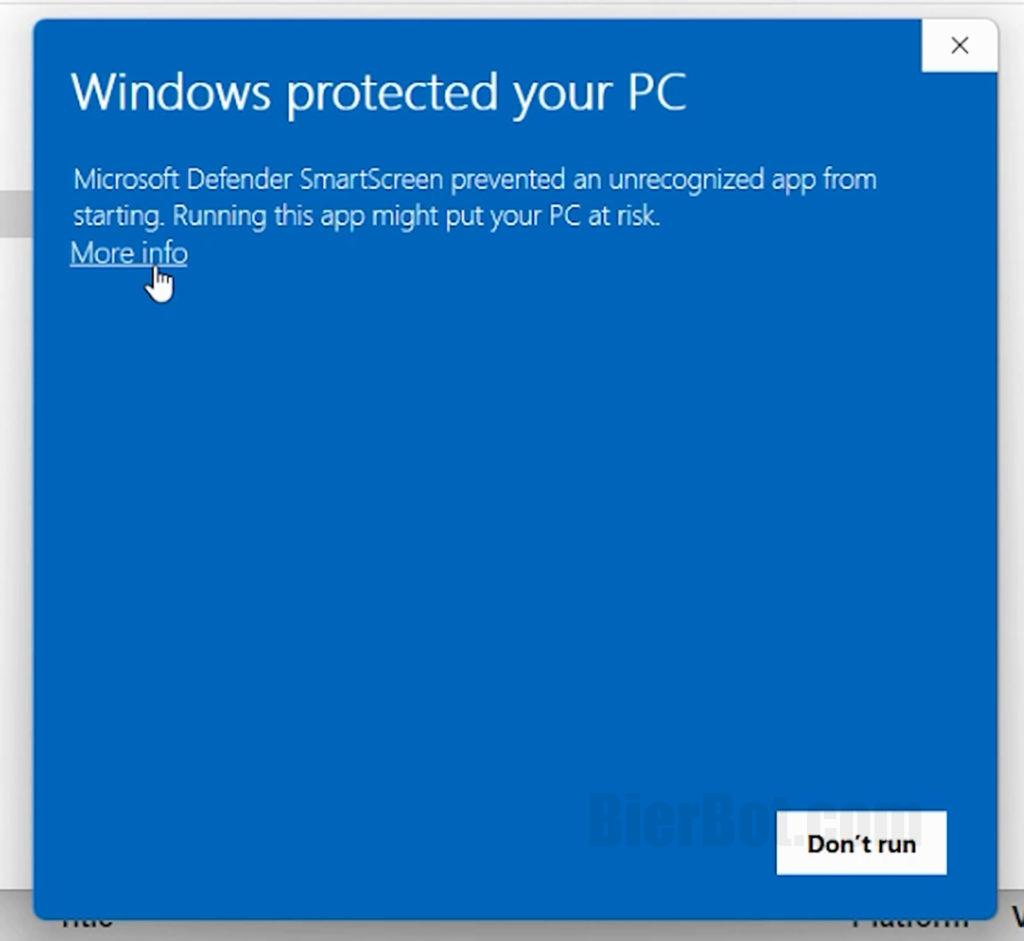
Confirm you want to run this software with “more info” and “run anyway” 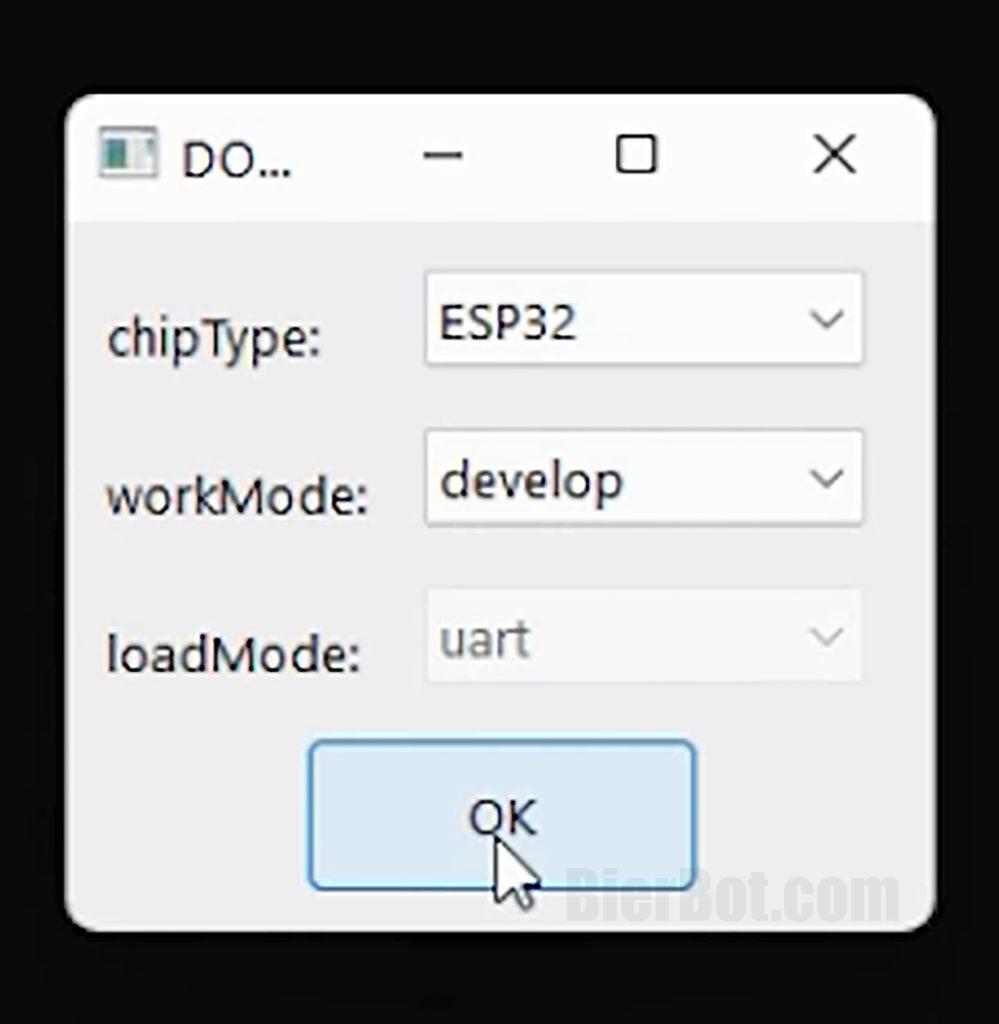
Select ESP32.
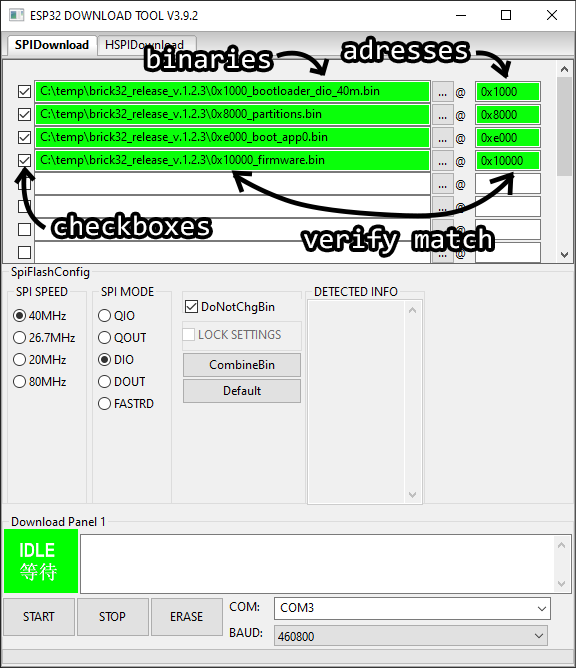
Now we have to select the binaries from the release folder we just downloaded and configure the flashing tool:
- Select the four binaries in the order shown. Select the respective addresses (starting with
0x) on the right. - Check all four checkboxes to the left of the filenames.
- Make sure the beginning of the filename (i.e.
0x8000_) matches the address on the right (i.e.0x8000) for each respective row. - Select “SPI SPEED” of “40MHz” (should be the default),
- set “SPI MODE” to “DIO” (should be the default)
- check “DoNotChgBin”.
- At the bottom select the COM port (to figure out which one is your USB to serial converter, simply unplug and plug it back it), i.e. “COM3”,
- set “BAUD” to “460800”.
Final result should look like this:
But don’t click “START” yet! Before we can do that, we have to put the Sonoff TH Origin into flashing mode. To do that:
- Unplug the USB cable on one side (PC and PCB side works)
- Hold down the button on the Sonoff TH Origin
- While still holding down the button: Insert the USB cable again
- Release the button
Now it’s finally time to hit “START” in lower left corner of the Flash Download tool. If the flashing fails: Check your cable connections (does RX go to TX and vice versa), repeat the four steps above and re-open the Flash download tool.
Setting up your first mashtun
As an example, we’ll setup a mashtun. However, the Brick32 can be also used to control freezers, glycol chillers, agitators and pumps. Head to your brewery and connect the plug of your mashtun heating to the socket of the Brick32. Connect the Brick 32 to the wall. Insert the temperature probe into your mashtun and connect it to the brick.
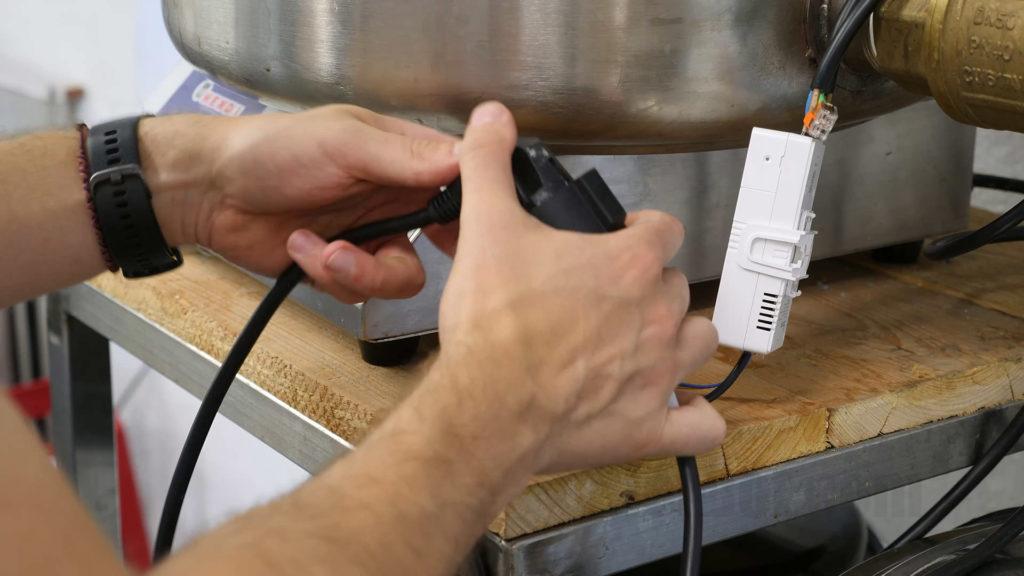
Connect your heating device. 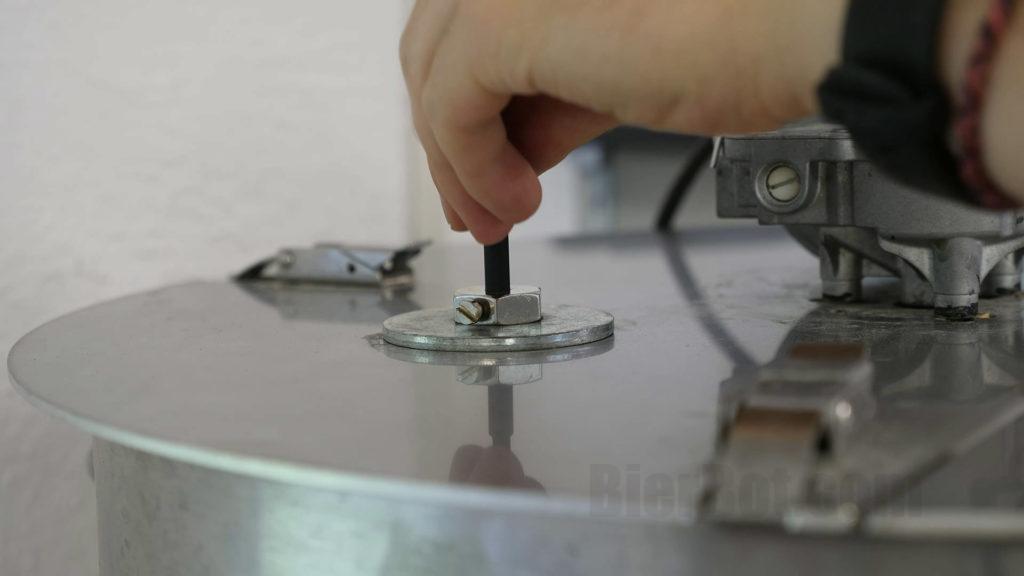
If it does not fit with the rubber… 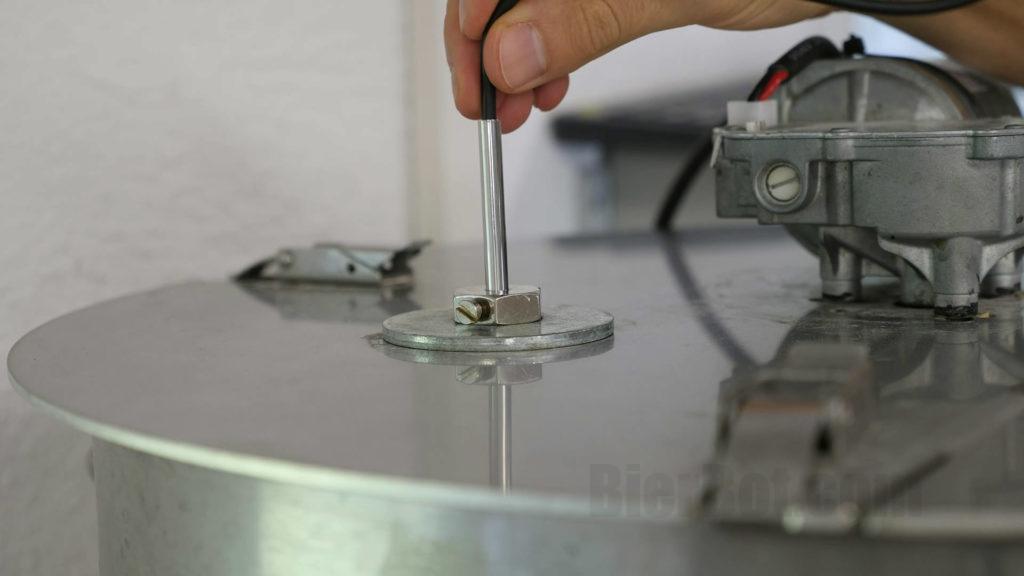
… remove the rubber.
If the temperature probe does not fit your thermowell, you can safely remove the plastic cover at the end.
Now:
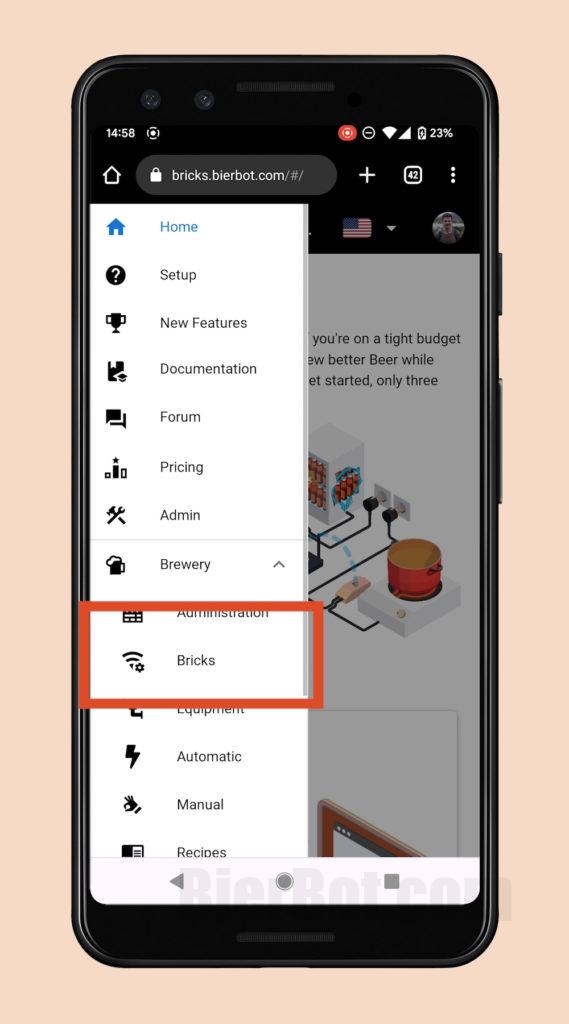
- Go to bricks.bierbot.com
- Open the menu on the left and head over to “Bricks”
- Hit “Add Brick” or hit the blue “Plus” button on the top right.
- Select the Brick you want to add, in our case it’s the Brick32 (Note, you can also add iSpindels, TILT and Raspberry Pi, but we’ll save that for a different day)
- Copy the API key into your clipboard.
- Open the W Fi settings of your device and look for a hotspot named “Brick-32-000….” (“…” being a random number). Connect to it.
- You’ll be redirected to a captive portal. Hit “Configure WiFi”
- Tap on your WiFi network, provide your WiFi network password and paste the API key from your clipboard. Hit “Save”.
- Go back to the website and wait for the Brick to appear. Activate or rename it.
Step #2: Add Brick. 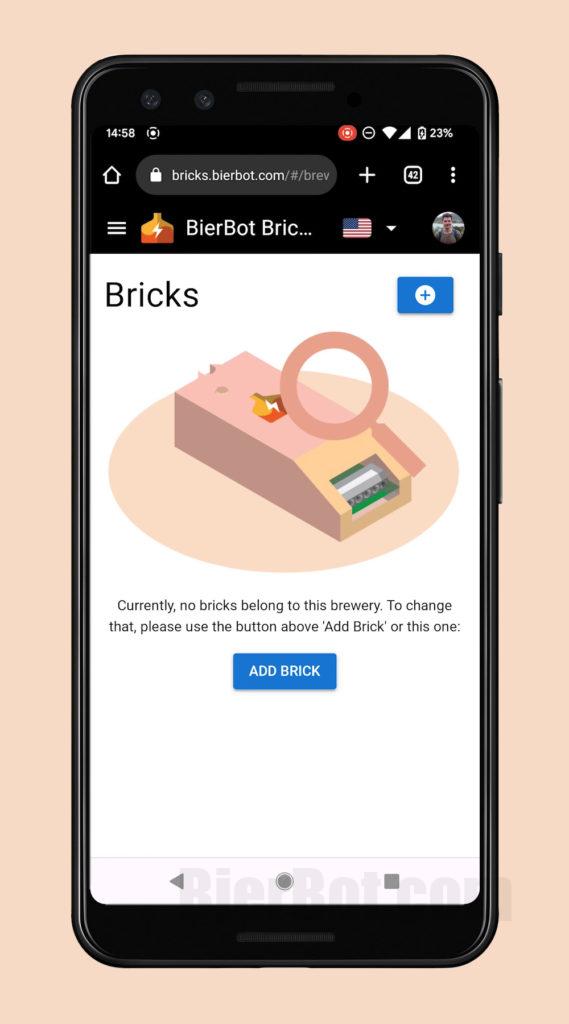
Step #3: Add Brick. 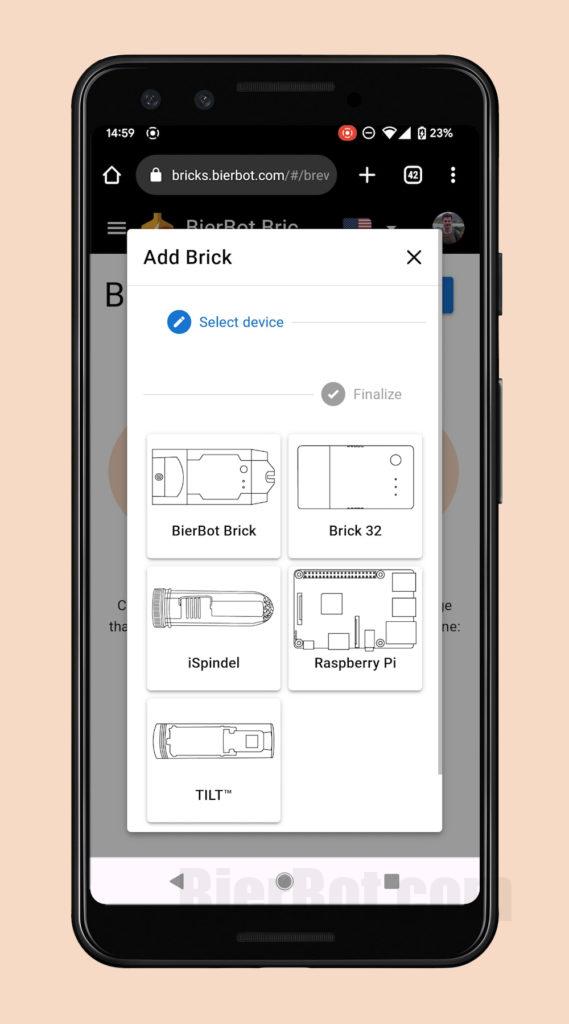
Step #4: Select Brick32. 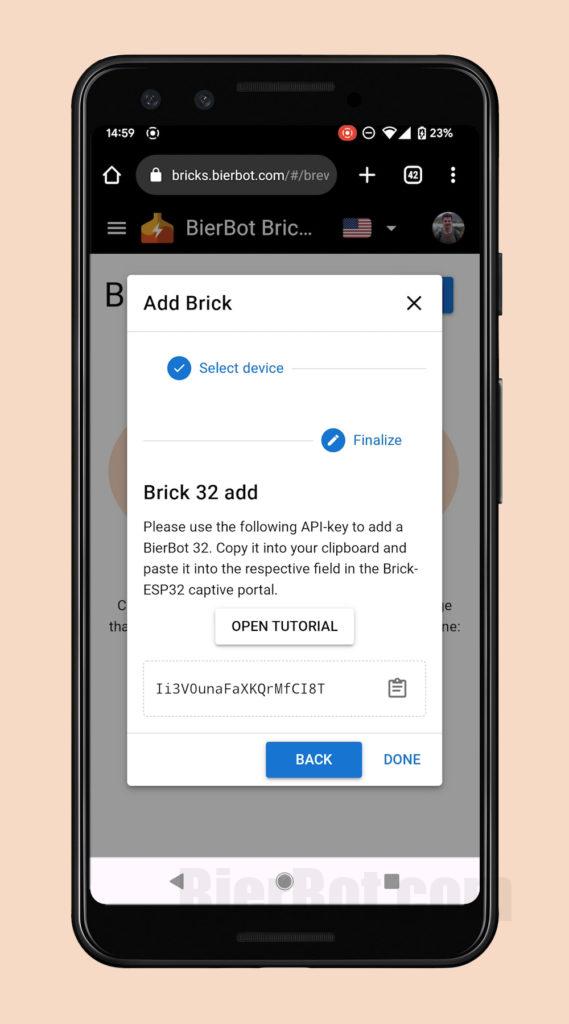
Step #5: Copy API key. 
Step #6: Connect to Brick hotspot. 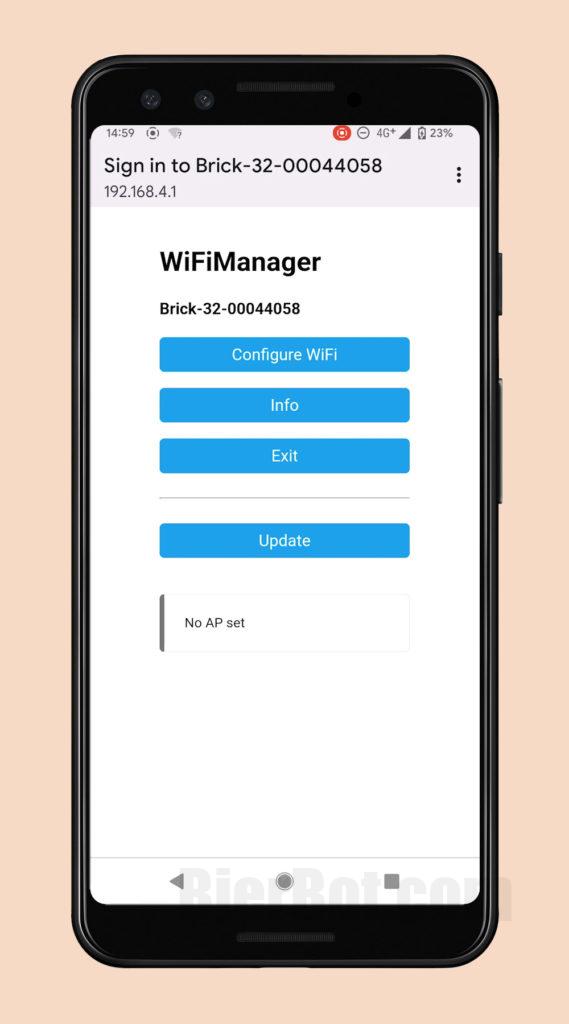
Step #7: Hit “Configure WiFi”. 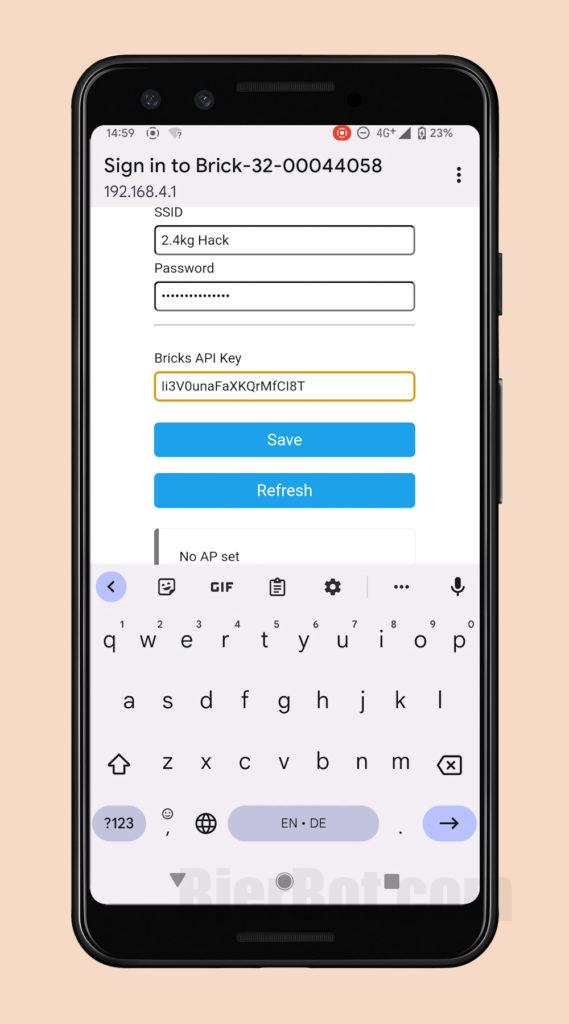
Step #8: Provide WiFi credentials & paste API key. 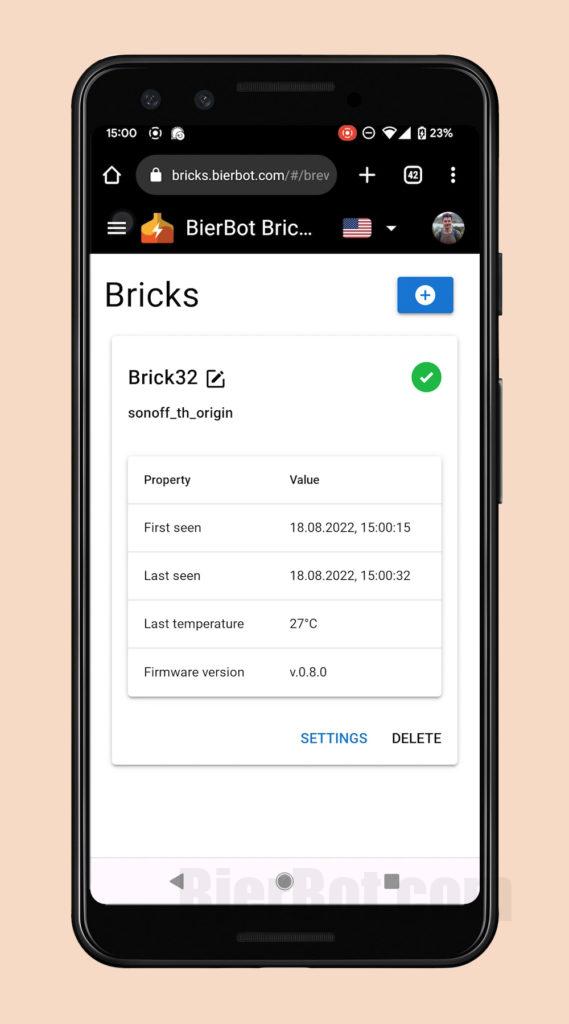
Step #9: Brick is ready to go!
Now you only have to map the relay of your Brick32 to the heating of your mashtun by drag and dropping. How to do that is very well explained in the official documentation available here: https://docs.bierbot.com/getting-started/setting-up-your-first-mashtun.
Features
- Button on the control to override the automatic mode and manually switch the relay OFF or ON.
- 3 Status LEDs (booted up? State of the relay? WiFi connection established?)
- Various kettle setups supported: BIAB, RIMS, HERMS.
- Various fermentation setups: Freezers, keezers, glycol chillers.
- PDI controller that works with a simple and cheap non PWM/SSR relay and yet eliminates temperature overshoots.
- Mashing controller and fermentation controller, both with automatic timer control.
- Multi-language (German, English, Portugese, Spanish, tell us if you want to help!)
- Integrated recipe management: Set the temperature, the time, etc.
- Integrated logging: See your temperature log during the mash and export a PDF after brewing
- User authentication
- Access from everywhere
- Found a brewery and invite friends to share equipment, recipes, etc.
- Works perfectly on any Smartphone, Tablet, PC or Mac (or any web browser)
- Beer.XML import
- Configurable units for temperature (Celsius/Fahrenheit), gravity (°Plato, specific gravity), volume (Liters, Gallons), weight (Grams, pounds) etc.
- Control agitators, pumps, valves.
- Free, open source license (GPL-3.0 license).
Disclaimer
⚠️ DANGER OF ELECTROCUTION ⚠️
If your device connects to mains electricity (AC power) there is danger of electrocution if not installed properly. If you don’t know how to install it, please call an electrician (Beware: certain countries prohibit installation without a licensed electrician present). Remember: SAFETY FIRST. It is not worth the risk to yourself, your family and your home if you don’t know exactly what you are doing. Never tinker or try to flash a device using the serial programming interface while it is connected to MAINS ELECTRICITY (AC power).
We don’t take any responsibility nor liability for using this software nor for the installation or any tips, advice, videos, etc. given by any member of this site or any related site.
Pingback: Boel iTap X review - The joy of bottling | BierBot | Homebrewing automation